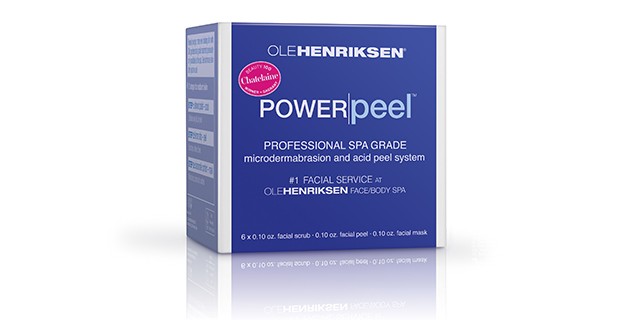
Ole Henriksen Power Peel- At Home Microdermabrasion
After years upon years of trying countless beauty products, I long ago became a very skeptical buyer. As someone with oily combination skin, one of my longtime skin care concerns has been maintaining healthy cell turnover to minimize clogged pores, acne and sun spots. When microdermabrasion first became the trend du jour, I was excited but waited patiently to see how trend mongers fared with this then new-fangled procedure.
After dermatologists, beauticians and everyday women around the world declared the marvels of microdermabrasion, I gave it a try and was hooked from first try. The procedure really did deliver its promise of baby smooth skin and dramatically reduced the appearance of scars, post-acne spots and sun spots. After each treatment, my skin remained perceptibly softer for at least a week at a time. After several consecutive treatments (once per month for about 3 months), my pores also clogged much less and fine lines were completely gone.
Due to frequent traveling and sometimes financial constraints, I did not keep up with the professional microdermabrasion continuously. At a minimum of $100 per treatment session (in major cities, the cost goes even higher), my perfect skin had to take a back seat to running my company and paying my employees.
When I heard about Ole Henriksen’s Power Peel at-home treatment, I was skeptical to say the least. There have been numerous skin care products from some of the world’s most famous companies touting the virtues of their microdermabrasion kits and how our faces would come out sparkling, bright, luminescent and smooth, along with every other adjective in the beauty book and every one of those products came up short in my experience.
So what’s different about Ole Henriksen’s microdermabrasion kit? First of all, it comes in a 3-step kit, 6 kits per box. Step 1: an Almond Polish/Scrub that exfoliates surface dirt and dead skin. It’s thick, it’s the perfect size of grit where you can feel the dead skin falling off as you rub without worrying that the granules are so big and rough that your face will be left red and raw. Step 2: Lemon Strip that contains lactic, fruit acids and glycolic acts as a powerful peel- the kind you could typically get only at a spa or dermatologist. With just a slight tingling, this clear, thick paste that we slather on the face after the first exfoliating step stays on for just a couple of minutes. Step 3: Chamomile Comfort is the mask made with- you guessed it- chamomile, and rose hip and jojoba oils to calm and comfort the skin after we’ve just stripped it of all the built up dead dirt. This creamy concoction goes on right on top of the Lemon Strip and stays on for 15 minutes before washing off.
The results? Ole Henrisken keeps his promise. My skin felt every bit as soft, smooth and supple (the 3 S holy grail of skin care) as when I go to the spa or dermatologist. The cost of doing a professional microdermabrasion and glycolic peel at the spa or dermatologist? An average of at least $150 combined and that’s a lowball figure for major cities. The cost of Ole Henriksen’s Power Peel 3-step microdermabrasion and peel kit? $45. With 6 kits per box, that will last you anywhere from 12 weeks if you have oily/combination skin like mine (use 1x every 2 weeks), or up to 6 months if you have dry or sensitive skin (use 1x per month). Ole Henriksen’s Power Peel powers its way to the very top of my global favorites for best skin care products.


 Welcome to Food, Travel & Life with The Asian Fusion Girl. Learn more about the AF Girl and her various projects


